Adding Documents for a Patient to Sign in Visual Signature Capture
Staff members can add documents for a patient to sign in Visual Signature Capture. With the addition of the option to set a future completion date, there is an option to show/hide patients with documents not due today.
- From the main page, sign in as a staff member.
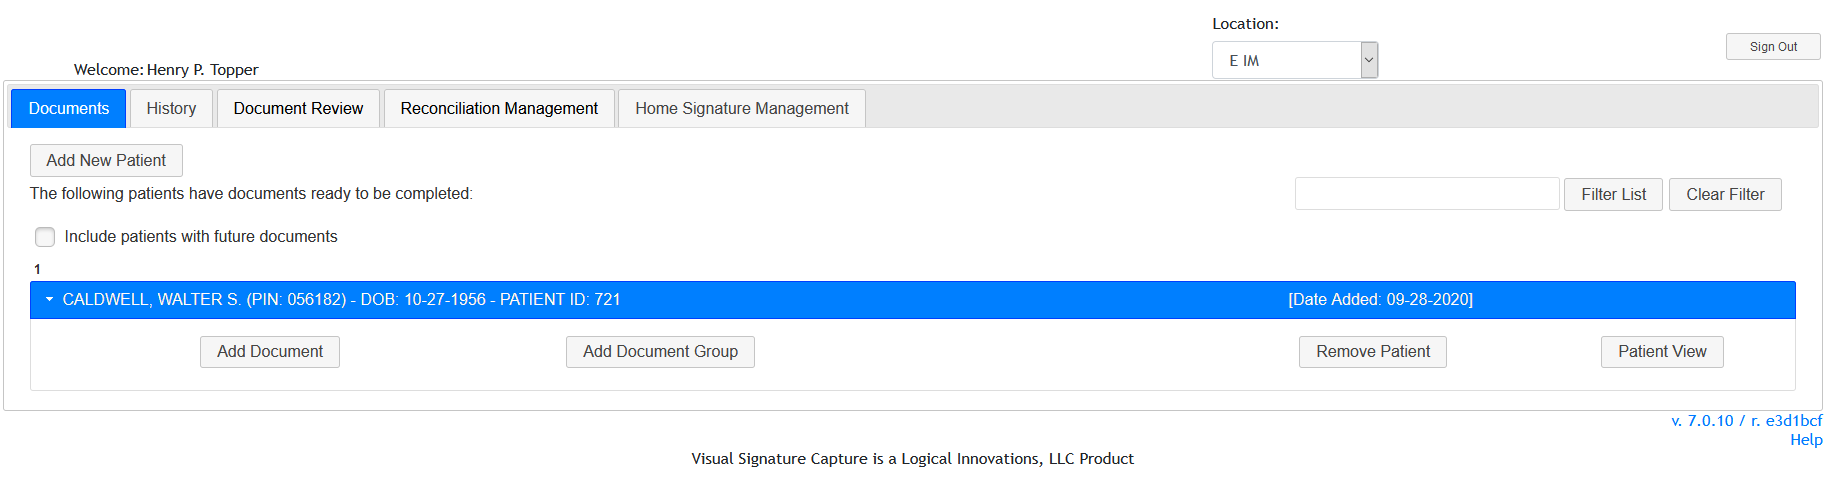
- Locate the patient of interest in the Documents tab or add the Patient as described
in Adding Patients. You can use the Filter List dialog to search for an existing patient. If you want to also see patients whose documents are not due to be completed today, check the "Include patients with future documents" check box. Just type part or all of the patient's last name or first name or a combination of all or part of the last name, a comma, then all or part of the first name and click "Filter List". You can use "Clear Filter" to return to the default view. If "Include patients with future documents" is not checked and your filter matches one or more patients with future documents, they are not shown.
- If the Add Document/Remove Patient/Patient View buttons are hidden for the patient
of interest, click on the patient to reveal these buttons. Next, click on the Add Document button.
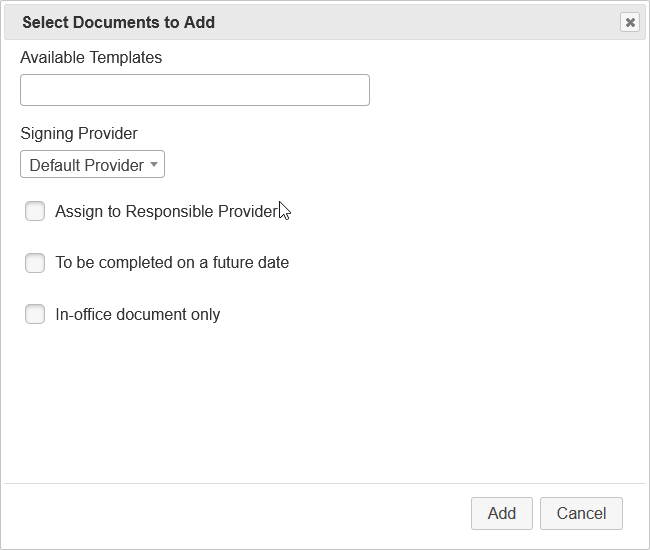
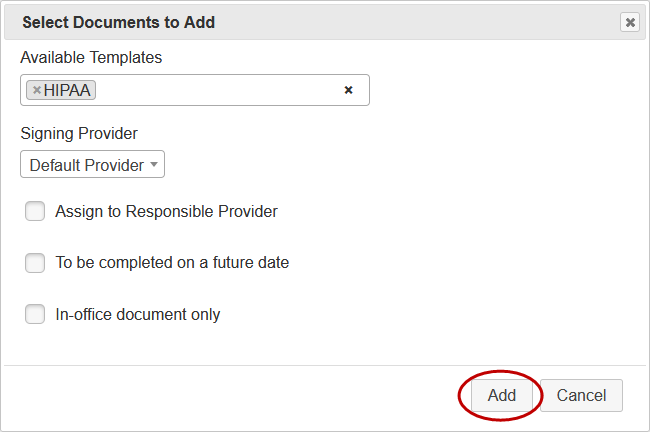
- The Select Documents to Add dialog box will appear.
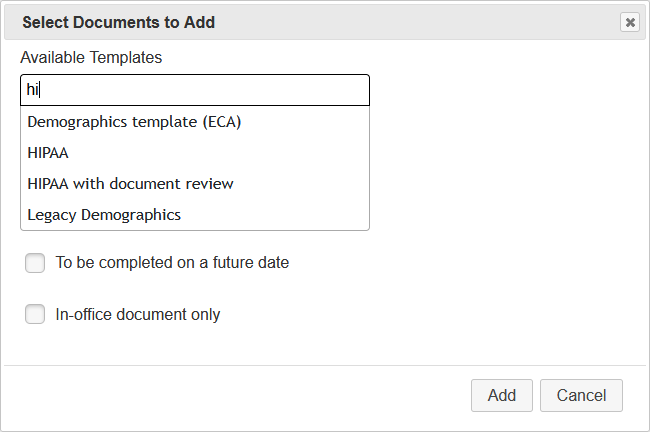
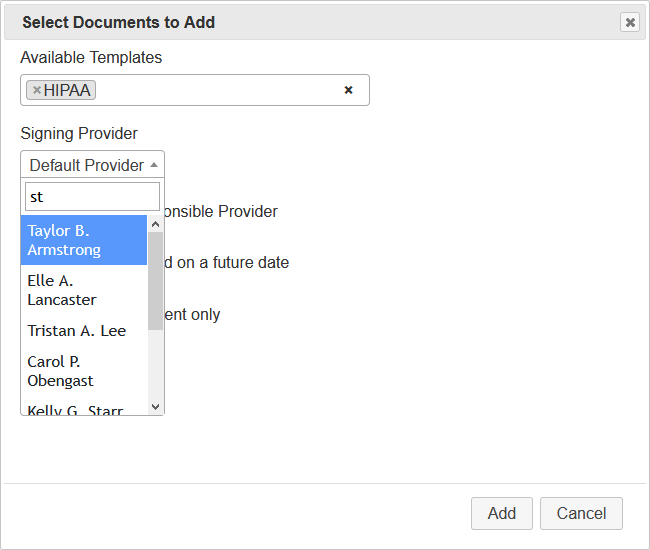
- Select the document(s) to add by beginning to type the template name or click in the Available Templates box and then selecting the document
when the name appears. You can add multiple documents. See this article to learn how to add multiple documents at once or use the keyboard to add Documents. To remove a document you added, click the "x" to the left of the document name. If the document to be added is not present, your Site Administrator
can add the document as described in the Managing Templates help section.
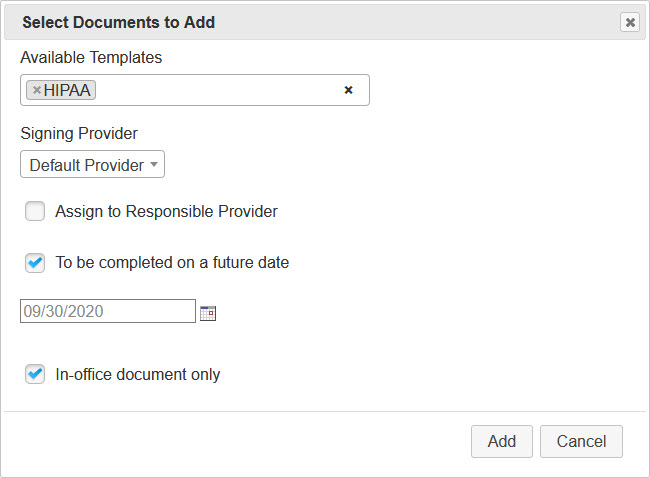
- You can also add a signing provider for this document. Signing providers are listed alphabetically by last name. Signing providers are described
in the Signing Providers help section.
-
In prior versions of VSC, documents were typically added and expected to be filled out the same day or the next day. Now that patients will likely be assigned documents further in advance for appointments scheduled in the future, documents can be added with a future completion date. Also, staff can specify if certain documents should only be available to be filled out in the office and not when the patient accesses their documents from a remote location. Similar options exist for Rules (automated addition of documents).
- After selecting the document(s) from Available Templates, click Add.
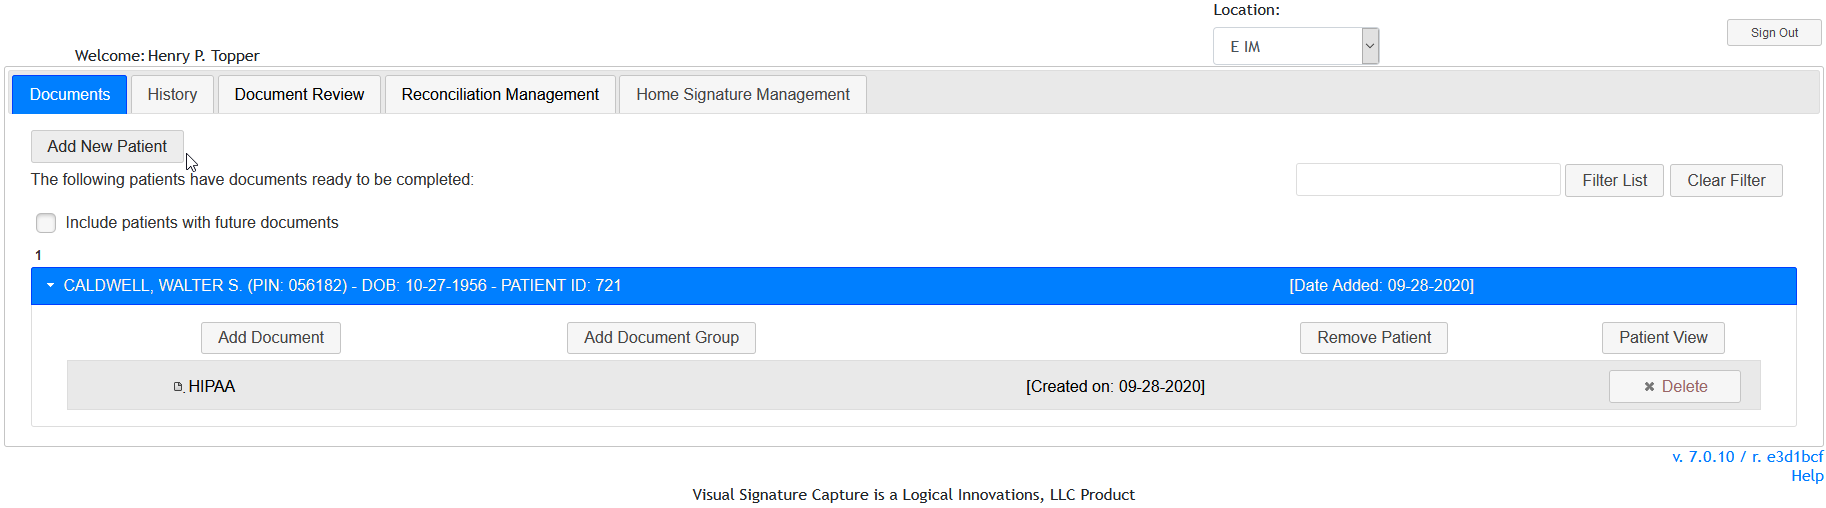
- The Documents will now appear under the patient's name. Clicking
on the patient's name will hide/unhide the Add Document/Remove Patient/Patient View buttons and the documents. NOTE: If the Document was set to be completed at a future date, it will not show under the patient. If that was the only Document for the patient, the patient will not show on the Documents tab. To show those Patients/Documents, check the "Include patients with future dated documents ".