Creating, Editing, and Managing Templates and Template Groups
The instructions below explain how to upload an existing Template created in Visual Form Editor that can then be used
to assign documents to patients. These Templates are written in XML and render as HTML documents to be signed by the patient.
These documents are then saved in PDF format after the patient finishes signing. For information on creating
Visual Signature Capture Templates, refer to the appropriate section of the Visual Form Editor help. Templates can be easily edited by loading an updated XML file into an exiting Template. Templates can also be added to a Template Group, which allows a user or a Rule to add multiple Templates at one time. An example would be a Rule adding a HIPAA, a Financial Policy, a Consent to Treat, and a Patient History for a patient with a New Patient appointment. Templates also support multiple languages. If a patient's preferred language in Registration matches a language available for a Template, the Template will be offered to the patient in their preferred language, though another language can be chosen before opening the Template.
Note: If a template uses an image, such as a logo or picture the patient can draw on, the image(s) must be loaded into Visual Signature Capture before the template can be loaded. Information on how to load images into Visual Signature capture are at the bottom of this page.
Creating a Template
- Click on the "Sign In" button and log in as the Site Administrator or a user with administrative rights..
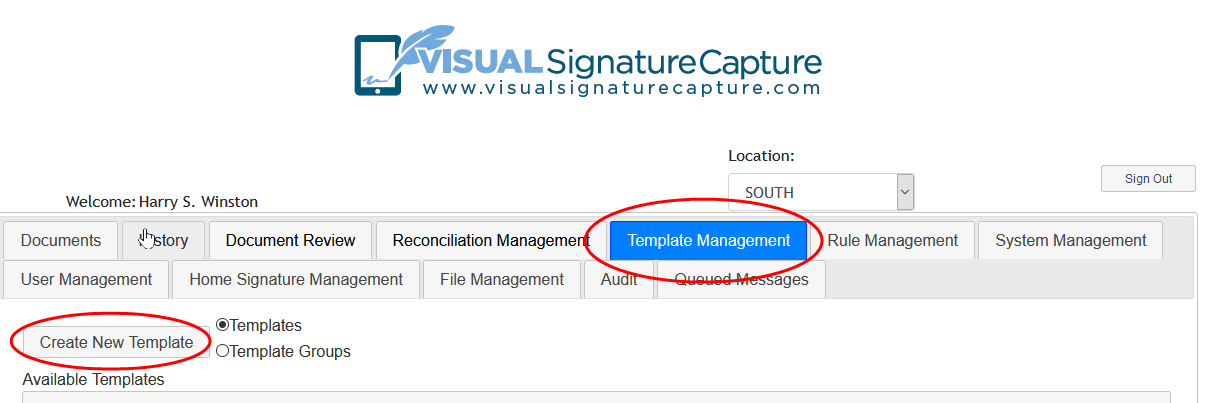
- Click on the Template Management tab.
- Click the "Create New Template" button.
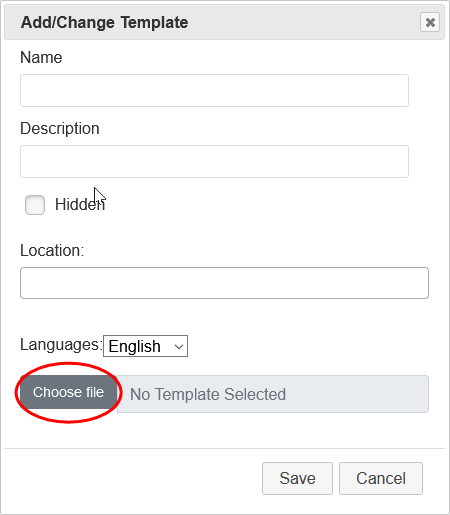
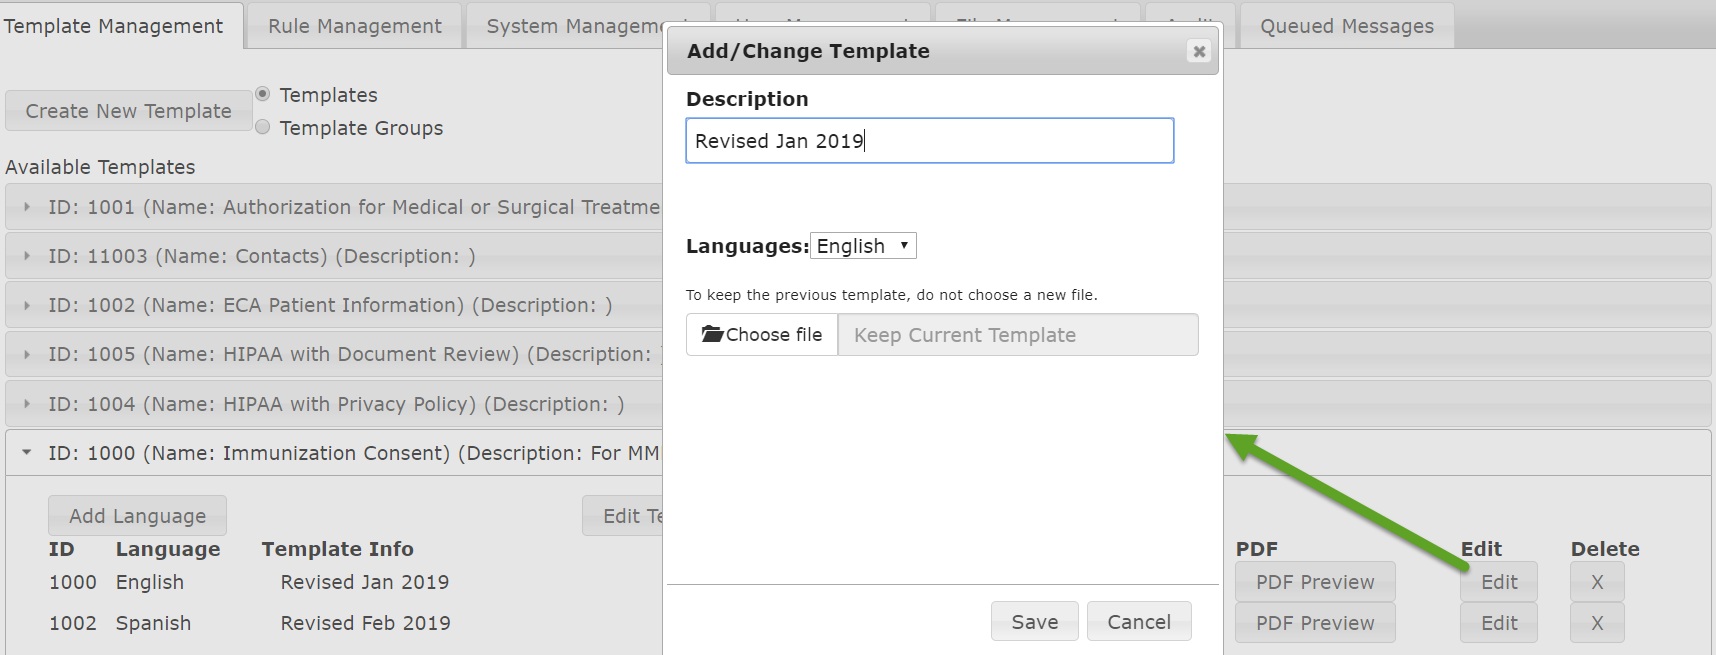
- When the Add/Change Template dialog box appears, click on the "Choose file" button.
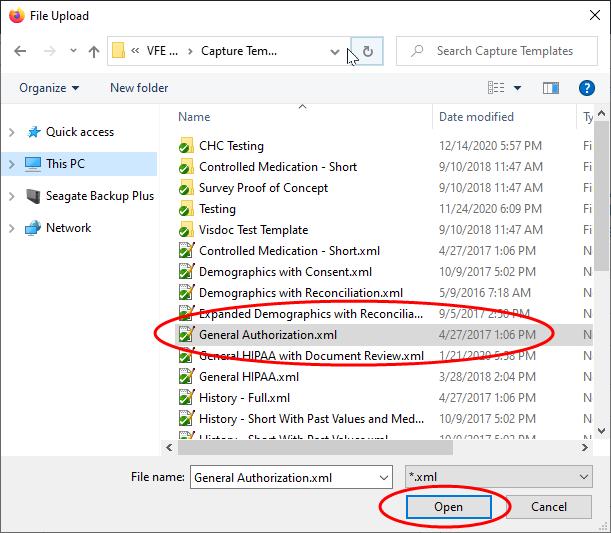
- Navigate on your file system to the location of the XML Template saved from Visual
Form Editor.
- Highlight the Template of interest and click "Open".
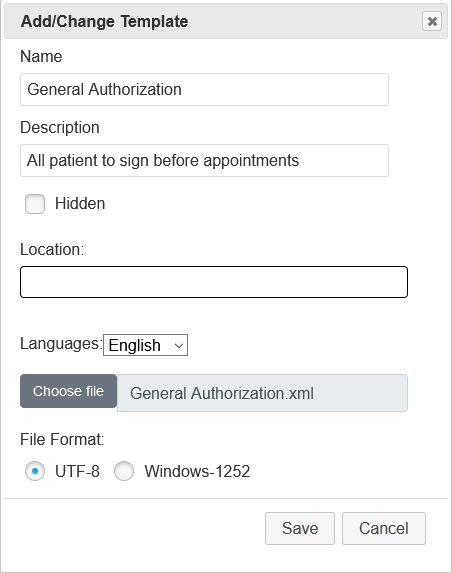
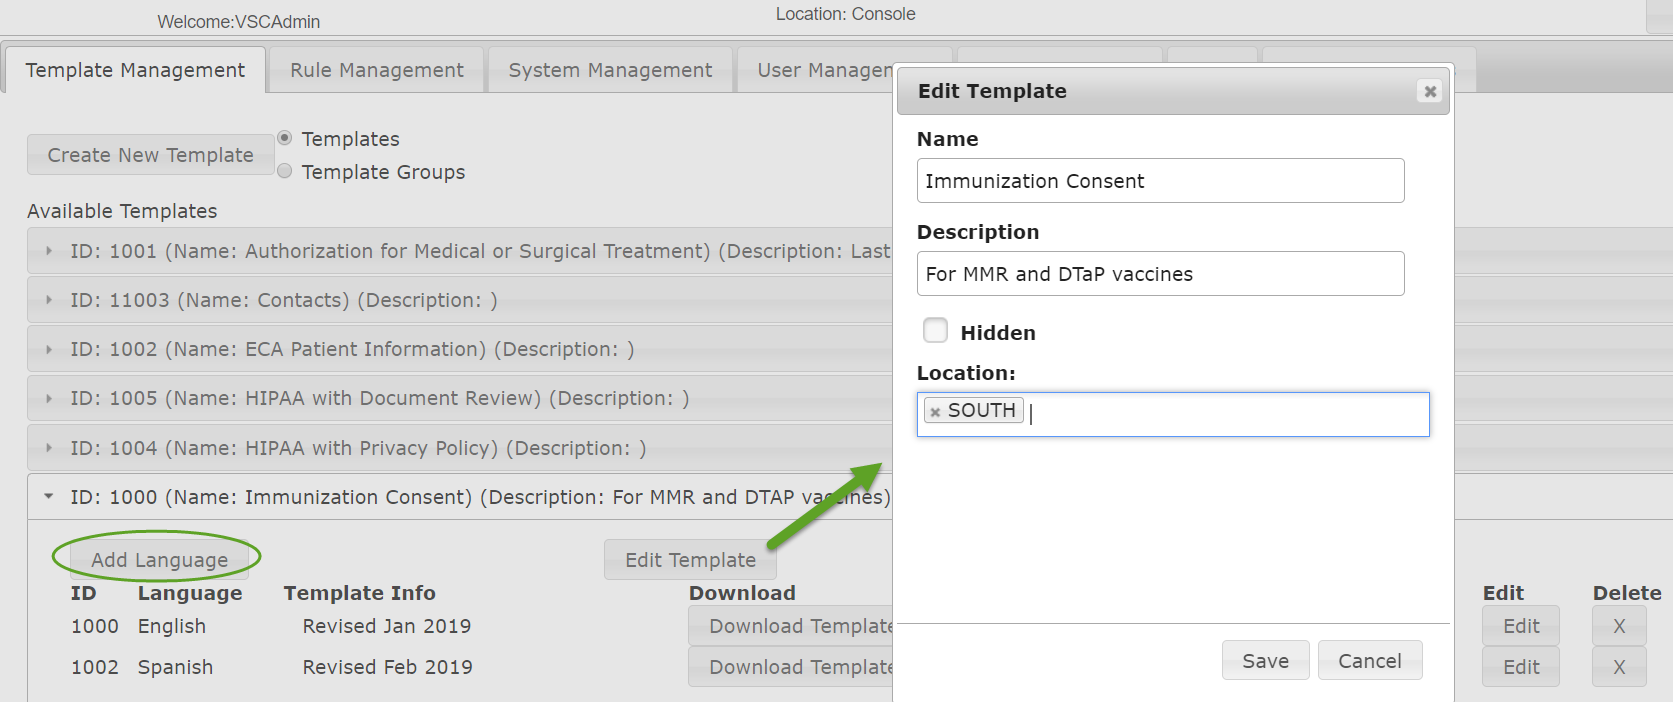
- Give the Template a Name (required) and Description (optional) and click the "Save" button. The Hidden check box will keep users from seeing the Template when adding Templates to a patient. This can be useful when an administrator is editing the Template and doesn't want to delete it. One or more Locations can be specified. If one or more Locations are added, this template will only be able to be added to patients in the Patient Queue under those Locations. The language of the Template can be specified in the Languages drop-down. You will see any languages set up in the Language Settings area of the System Management tab. Two file formats are now supported. This allows the use of Templates built with UTF-8 character
encoding (requires VFE 7.X or above). UTF-8 allows the use of additional characters for
expanded language support. Both VSC and VFE use UTF-8 by default.
- The Template will be loaded. It can be previewed as an interactive HTML document or as a static PDF document by
clicking the respective preview buttons.
- The Name, Description, and actual Template can be changed using the "Edit" button. Note that this will affect any
patients with documents assigned using this Template who have not begun to fill out the document.
- The Template can be deleted using the "X" button only if there are currently no patients assigned this Template and no Rules use the Template. If this Template is used in a Rule, you will receive a warning that you cannot remove the Template. You will need to either delete the Rule or edit the Rule to use a different Template before being able to delete.
Editing a Template
Editing a Template is simply replacing the current XML file with an updated XML file. To edit a Template, do the following:
- Click on the "Sign In" button and log in as the Site Administrator or a user with administrative rights..
- Click on the Template Management tab.
- Find the Template you wish to edit and click on the Template name to expand the item.
- Click the "Edit" button.
- Click the "Choose file" button.
- Browse to the updated XML file for this Template and highlight it. Then click the "Open" button.
- Click "Save" and your Template is now updated. You can use the "HTML Preview" button to view the changes.
Additional Languages for Templates
-
By default, English and Spanish are set up under Language Settings in the System Management tab. To add other languages, see the Language Settings topic.
-
Once an initial version of the template in a particular language has been created,
the folder for that template can be expanded.
Versions of the template in other languages can be added using the �Add Language� button.
The top level characteristics of the template can be modified using the �Edit Template� button.
- You will add the new Template in the additional language the same way you added the original Template. Browse to and select the XML file of the Template in the new language.
- To edit a template at the language level, the �Edit� button on the right hand side is used.
The description, language, and XML file can be modified.
Creating a Template Group
Multiple Templates can be grouped together to make adding them to a patient simpler by creating a Template Group.
- Click on the "Sign In" button and log in as the Site Administrator or a user with administrative rights..
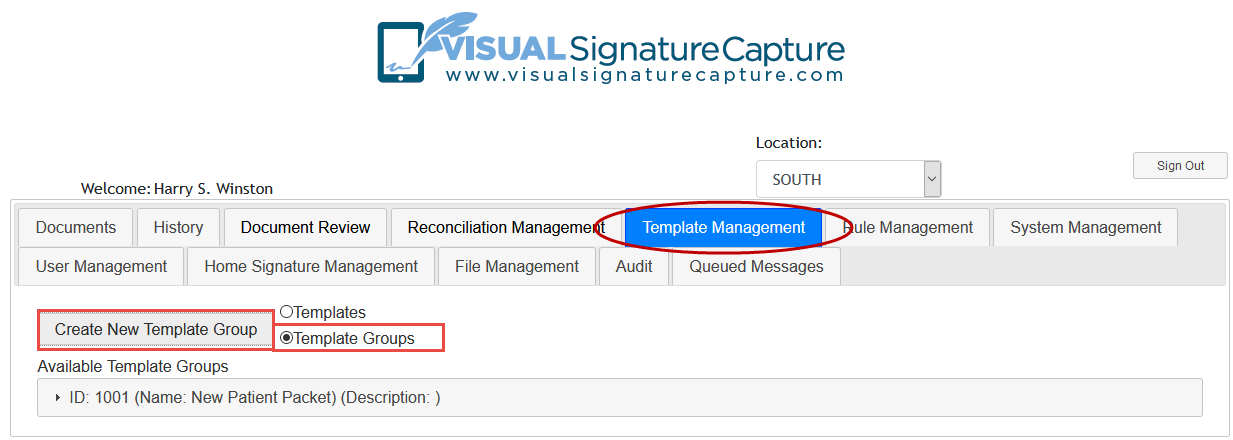
- Click on the Template Management tab.
- Click the "Template Groups" radio button and then the "Create New Template Group" button.
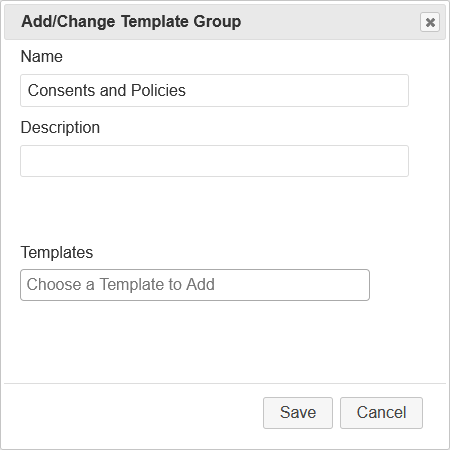
- When the Add/Change Template Group dialog box appears, give the Template Group a Name. The Description is optional and is only seen on the Template Management tab.
- Click in the Template box and a list of available Templates will appear. Choose each Template individually. Clicking anywhere in the box will bring up the list of Templates. You can add multiple documents. See this article to learn how to add multiple documents at once or use the keyboard to add Documents. If you add a Template you didn't intend to, just click the "x" preceding the Template name.
Click "Save" when finished.
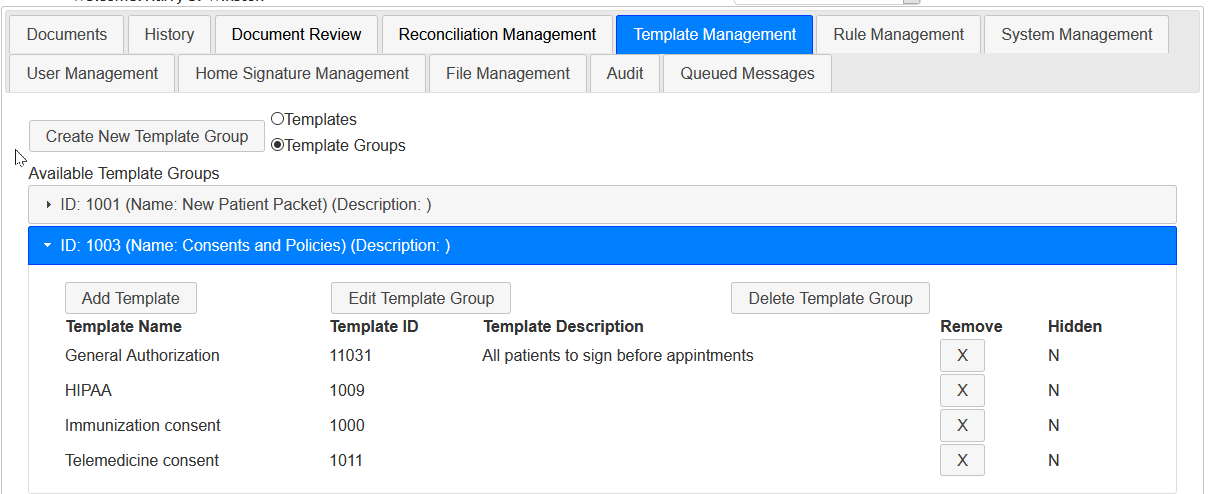
- Your Template Group has been created. Click on the Template Group name to expand it and show the Templates that make up the Template Group. You can remove a Template by clicking the "x" button in the Remove column. You can add additional Templates with the "Add Template" button. The "Edit Template" button lets you edit/add Name and Description. The "Delete Template Group" button will remove the Template Group, but does not delete any Templates from VSC. If this Template Group is used in a Rule, you will receive a warning that you cannot remove the Template Group. You will need to either delete the Rule or edit the Rule to use a different Template Group before being able to delete.
Ability to Store Images in the VSC Database
- In VSC 3.X, images could be displayed in Templates, but the images needed to be located (and
retrieved from) an external URL. While that option still exists, in VSC 4 or higher, images can be
stored directly in the VSC database, eliminating the need to pull them from an external location.
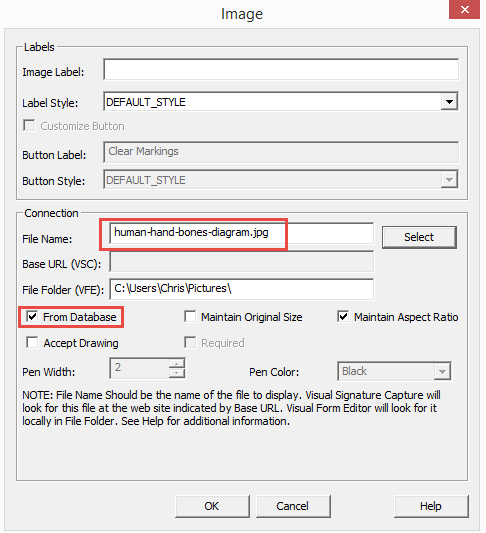
- In order to take advantage of this feature, one needs to build the Template of interest using
VFE 8 or higher. When inserting an Image, select "From Database" and the
Base URL field will be grayed out. Then select the file of interest.
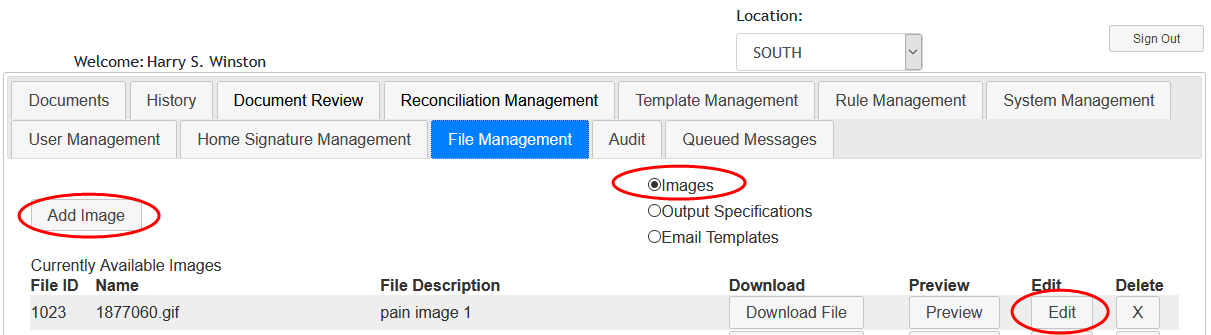
- Next, in VSC, sign in as the Site Administrator or a superuser and go to the File Management tab. Make sure
that the Images radio button is selected. Click the Add Image button and then load the image
(with the same file name) that is going to be used in the Template created above. You must supply a Description. You must load images before the Templates that use them or you will receive an error message when loading the Template. Once you load the image, you will be able to successfully load the Template. You can use the Edit button to reload the image if it has been updated.